Lampshades
Laser Origami
You can tell a roll of tape has been within my reach if you see these scattered around:
[picture of accordioned tape]
I thought an pleated pattern like this could make for a cool lampshade, and I wanted to do some experimentation with laser-creased origami. I made a pendant lamp for my apartment using this method a while ago:
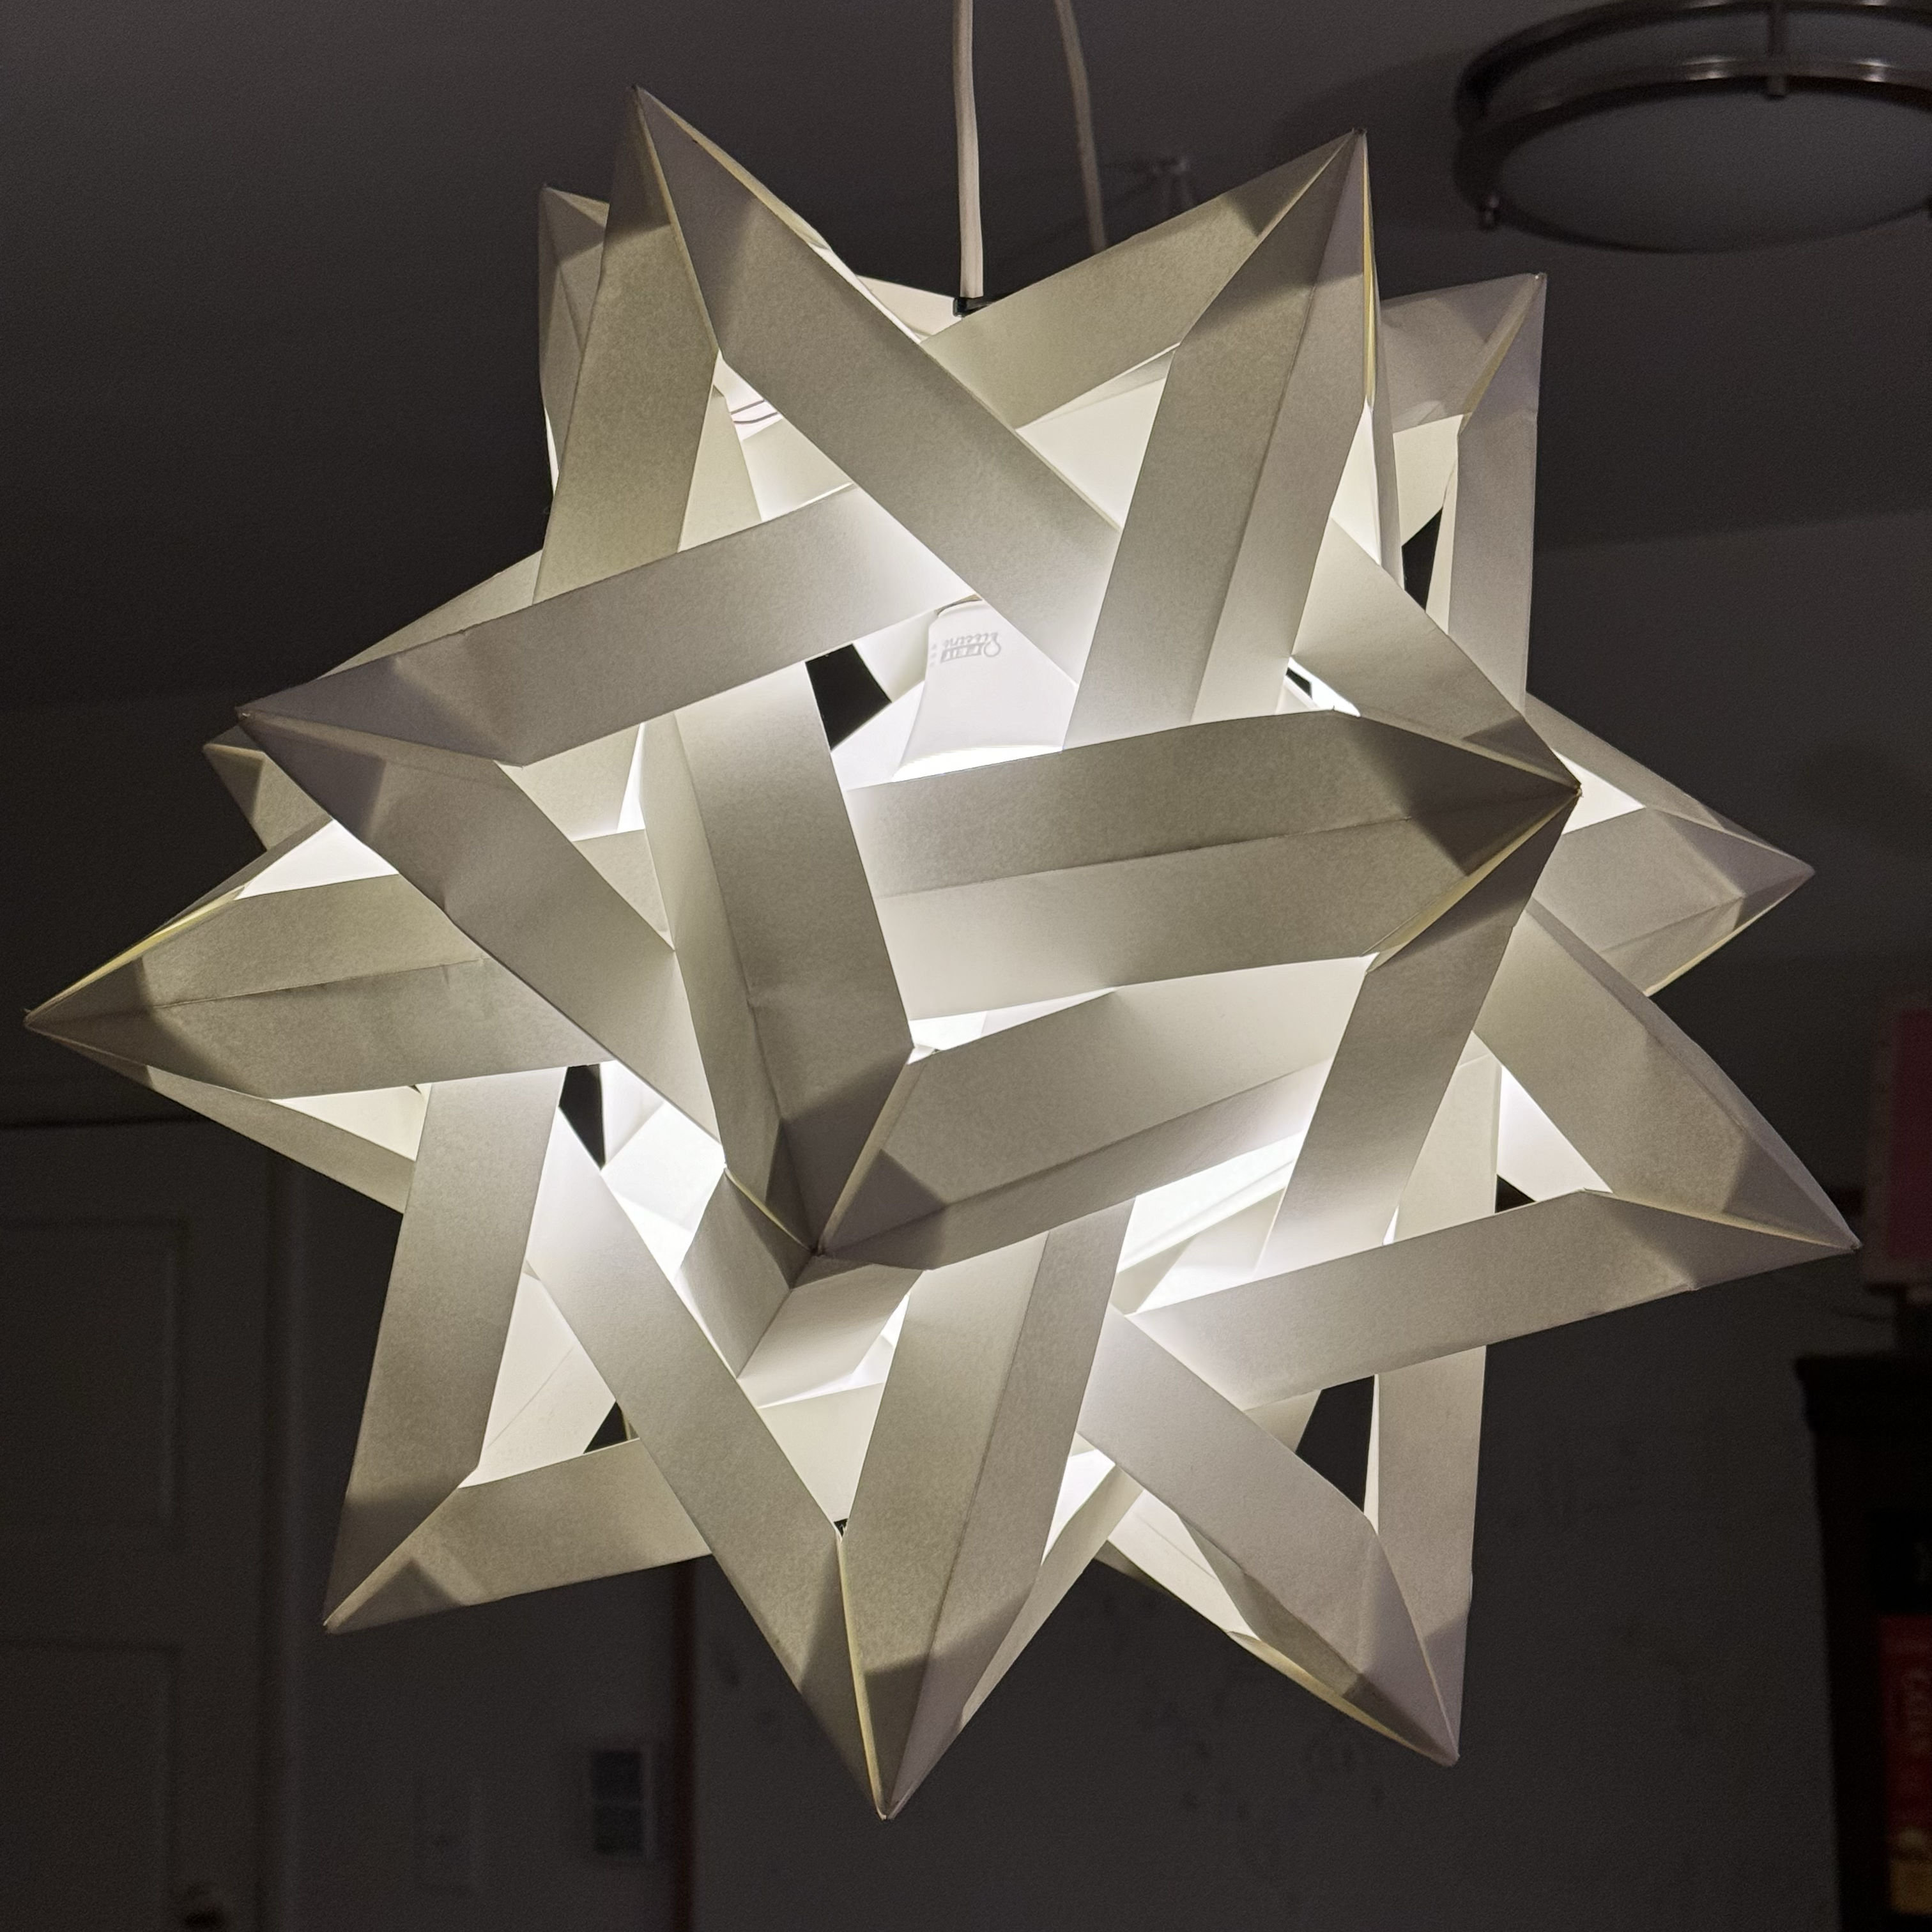
It’s made from 30 individual segments, each one pre-cut and creased by a laser. These 20-point stars are hard enough to assemble, so I was glad that I also didn’t have to do as much work on the folding. Vector engraving the creases also let me use heavy art paper, which is normally very unsuitable for origami and can’t be creased very well by hand.
Design
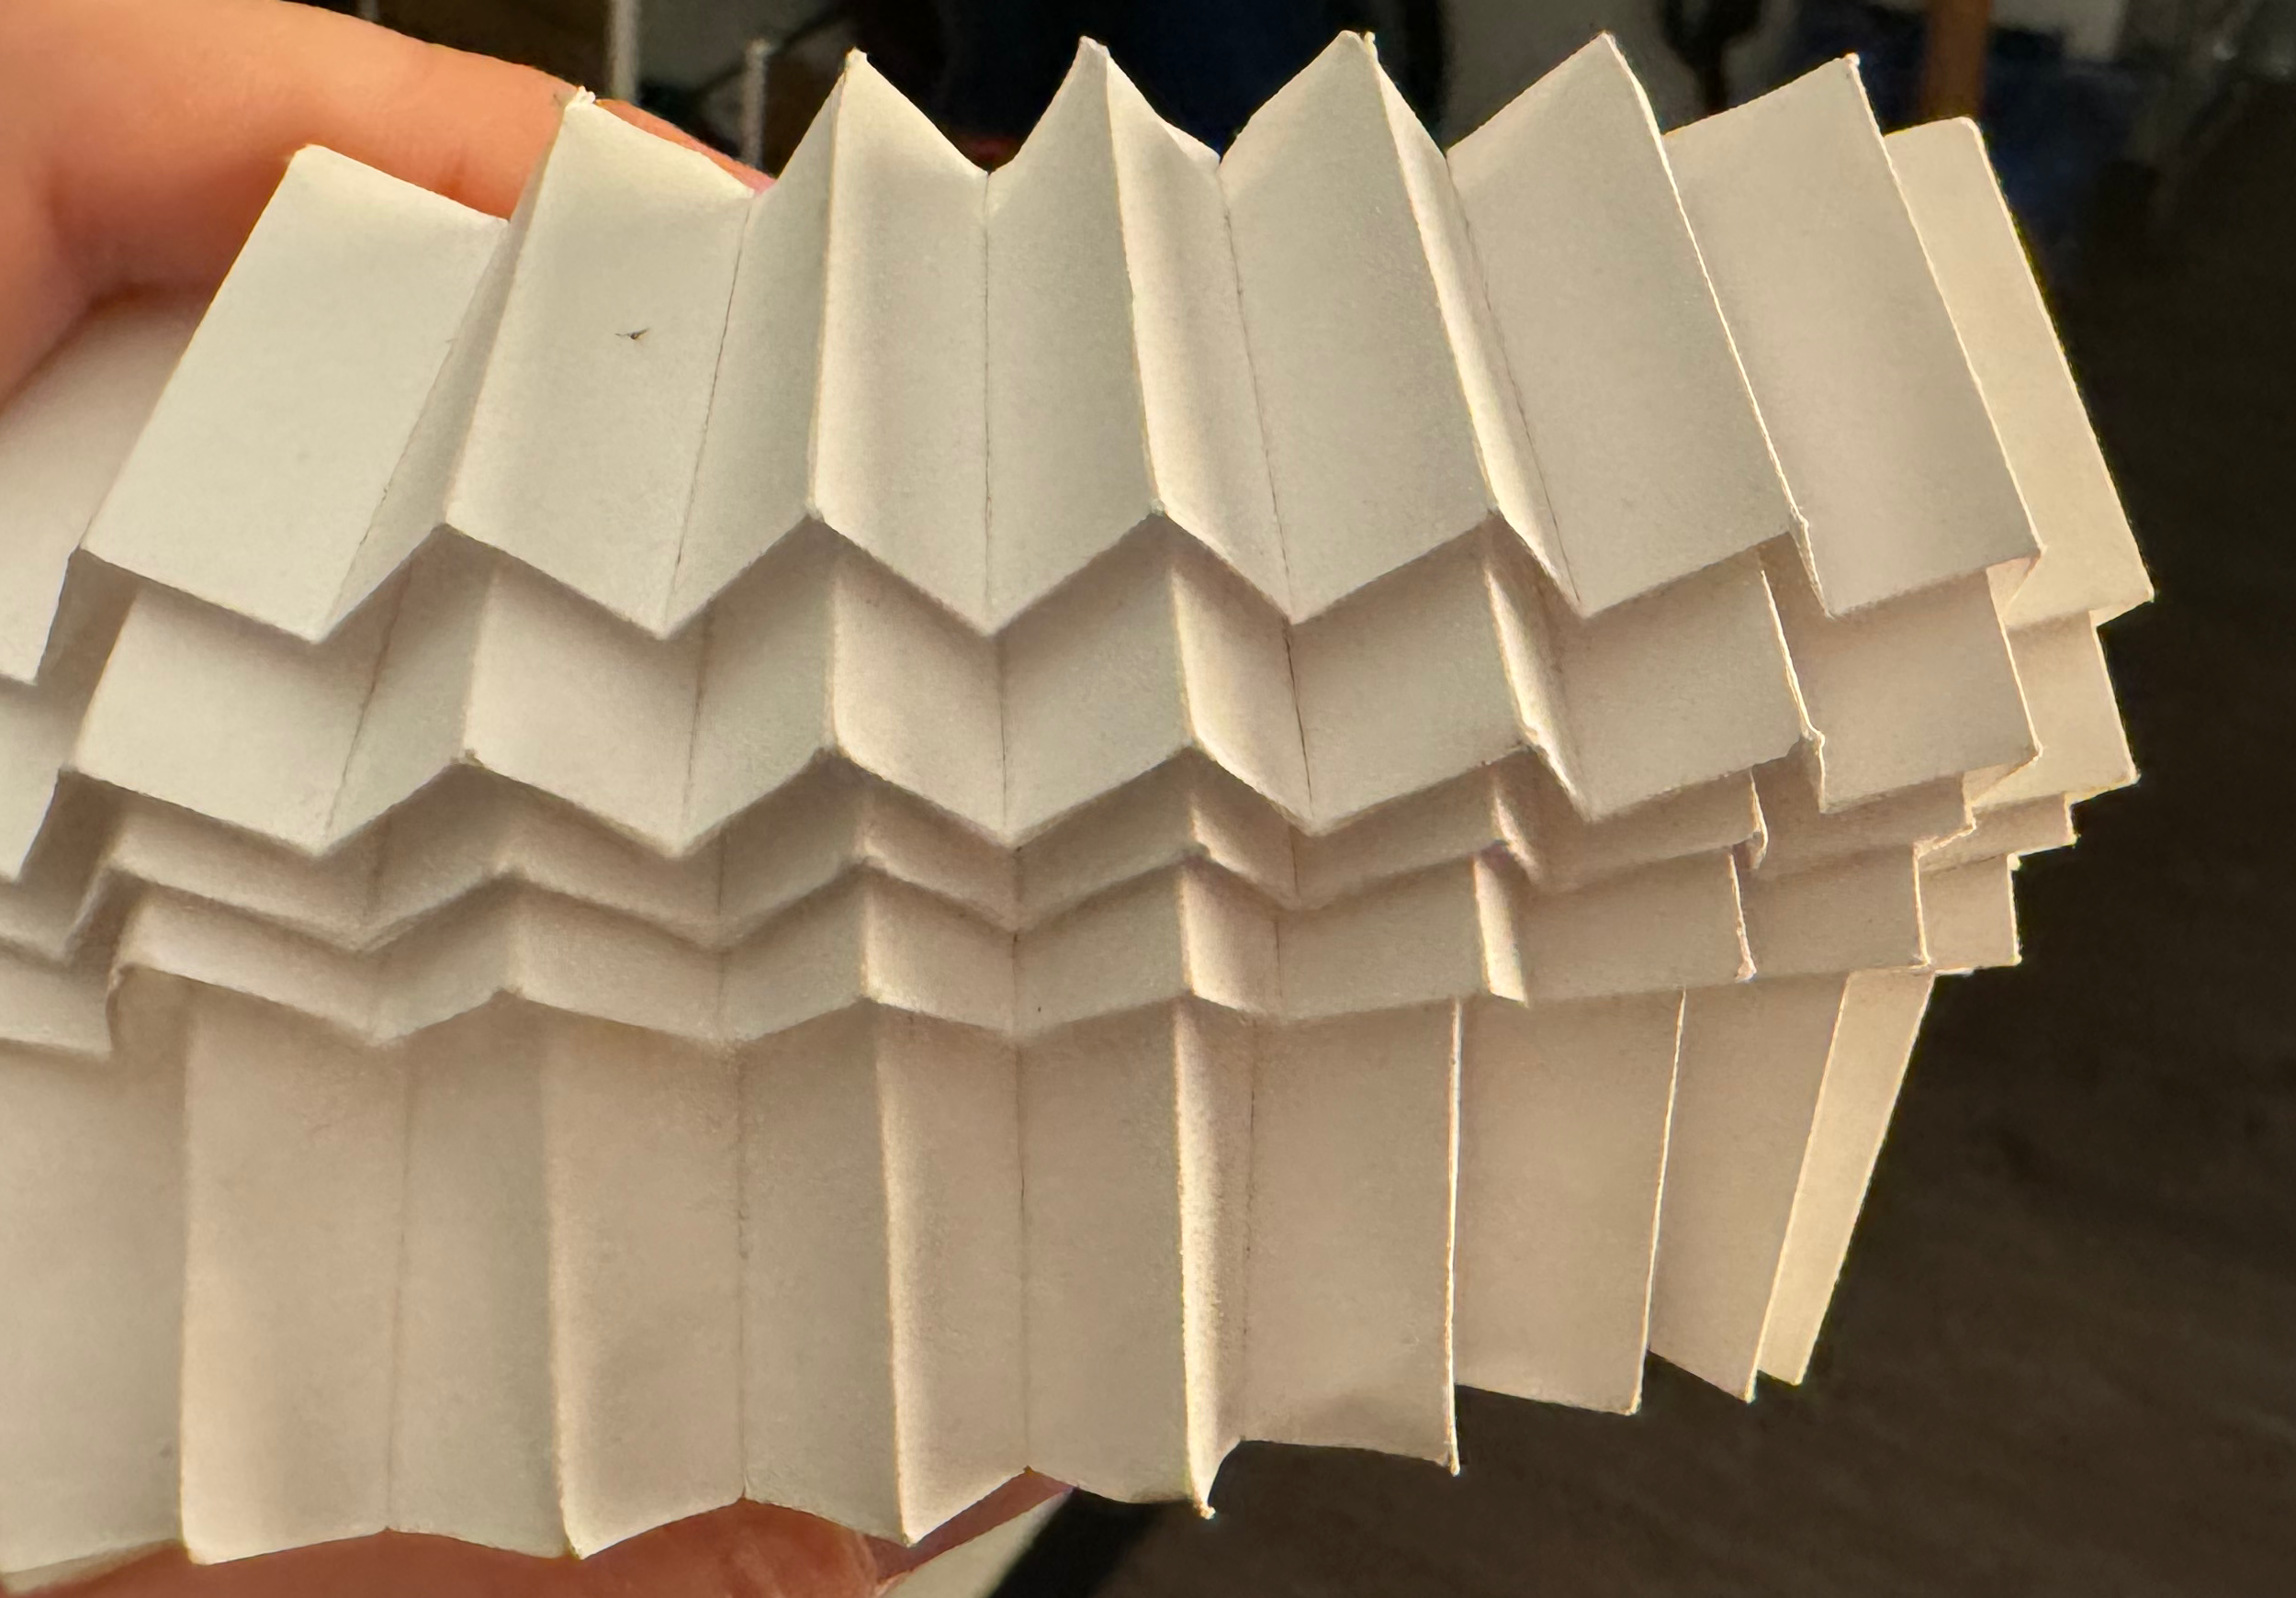
I wanted to make curcular lampshades with the same pleated pattern, and a series of cascading terraces like this:
This design only has a few parameters: The number of terraces, the angle at which they separate from each other, and the distance between folds. Manually defining these values, however, would tell you very little about what the final profile will look like. So I made an editor that prioritizes this profile and lets the user tune it using bezier curves:
The number of terraces can be changed, and you can slide folds along the curve and the underside of each terrace to achieve the final profile:
On the right you can see a readout that gives the height of this final profile as a percentage of the paper height. Since the design will be made on a laser cutter with a limited working area, its final size is constrained by that working area. More terraces with longer underside segments means more paper, and since there’s a limit to how much paper you can fit, this really just means the final piece will be smaller.
Export
There’s also a built-in export interface which color-codes the pattern for different power levels from the laser. Creating this design isn’t entirely trivial; segments of the profile can’t be measured absolutely but instead must be measured relative to the total length of all segments. This is calculated during the design process to give the height percentage.
The edge of each terrace is a doubled-back fold that just looks like a straight horizontal line on the net. But the folds at the top of each terrace, hidden under the previous one, need to have a V-shape at half the angle desired.
Note that this only gives the desired profile when the folds are squished flat; The angles will increase causing the entire piece to curl the more it is stretched. I haven’t figured out how to account for this stretch as a parameter since it’s changing constantly as the piece is manipulated. Perhaps a circumference value could give the amount of stretch.
I chose two parameters to be used during export, aspect ratio and number of pleats. These will determine what your piece ends up looking like. If you want a smaller piece with a lot of pleats, you can increase the aspect ratio. If you want to make a larger shade out of multiple segments, you can reduce these parameters and get a longer design that fits sideways on the paper:
As a bonus, I added the ability to save these parameters as JSON files; each non-function key on the keyboard is assigned a different slot which you can call up by pressing it. Folders are automatically created, and exported SVG files are named with the pleat count and aspect ratio.
The source code for this tool is on GitHub. If you make something with it please send a picture!